Workbench (REPL) widgets
SkookumScript commands can be typed and run on live projects on any platform using SkookumIDE command consoles called Workbenches – a form of a “read evaluate print loop” (REPL).
More sophisticated SkookumScript commands are often grown and tested in a Workbench before they are wrapped up into reusable routines. People also swap around these handy code snippets via chat, email, posting online, etc.
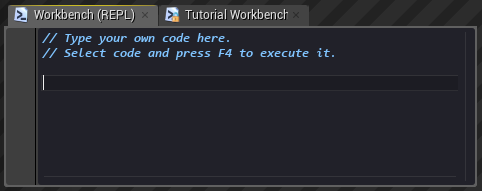
The Workbench widgets in their initial state. Note the lock symbol on the Tutorial Workbench icon indicating that it is read-only.
The basics
 Several of the script examples on this page assume that you are using the SkookumScript Unreal Engine 4 Plugin and the example SkookumDemo project that comes with it though many of the examples will work for any project. See the Unreal Engine 4 Plugin installation and setup instructions for more information.
Ensure that the runtime is started when you evaluate commands. If the runtime is not started, various game data may not be available or the commands may queue until it starts.
In a long-standing programming language manual tradition, we begin with the minimal amount of code needed to print something:
"Hello, world!"The SkookumIDE Workbench widgets allow you to run code snippets on any connected and running project. Type (or copy and paste) "Hello World!" into the Workbench (REPL), then open the Build menu option and select Execute Selection on Runtime.
In the Log widget you should see the following printed out:
"Hello, world!"
Simple, eh? No includes, mucking about with files, making classes, nor other typical language red-tape or bookkeeping is needed.
SkookumScript prints out the result of any script that is evaluated (or executed, run, called, invoked – whatever term you prefer).
NOTE You may have noticed that there are two Workbench widget tabs - the REPL and the Tutorial. The REPL Workbench is writeable, saves your changes and reloads with each launch of the SkookumIDE. The Tutorial Workbench is read-only since the example code snippets that it contains are frequently changed by the mad computer scientists on the SkookumScript team and any of your own custom code snippets would be lost with each update. You can still evaluate the Tutorial example code snippets or copy them over to the Workbench (REPL) if you want to edit them.
TIP: F4 is a keyboard shortcut for evaluating code. You can place the edit caret anywhere on a line and press F4 to evaluate the whole line or select some text even across multiple lines and whatever is selected is evaluated when you press F4. Using these mechanisms, you can evaluate any selection or line of text that parses correctly.
You can enter math into a Workbench. The SkookumIDE is a great calculator.
6 * 742
This is actually really useful. We mad computer scientists use it all the time.
NOTE Only the last expression is displayed as a result in the Log widget. Any results from expressions before the last expression will be ignored. If you want to use or see results from expressions that come before the last expression, you will have to store them in variables, pass them as arguments to routines or print them out.
All commands entered into a Workbench are run on an instance of the SkookumScript project’s default Master Mind object - it is the inferred this for any command. So when you evaluate code, it looks for routines and data in the project’s default Master Mind object and then its superclass and then the superclass of its superclass and so on. Every project can have its own customized Mind object.
Also see Mind objects and the Master Mind for more information on mind objects.
TIP: Since a result is often something you want to reuse, there are some hotkeys to help you copy it around:
- Alt+Insert pastes the most recent result string into the currently focused Workbench or Editor widget at the caret position
- Alt+Ctrl+Insert copies the result string to the system clipboard so the result can be pasted into other applications
What is a REPL?
Many languages call the ability to interactively evaluate code a read-eval-print loop or REPL and it is traditionally accomplished with a simple interactive command line prompt >. These REPLs read in a command, evaluate it, print out the result (usually in the same console) and then loop all over again with any new command. Since this is the 21st Century, SkookumScript’s Workbench widgets use a more sophisticated text edit box that can accommodate multiple lines of commands and easily allow you to scroll around. It also saves all your commands for later use, which can be very handy. While this is more than a traditional REPL, we still call it a REPL since it serves essentially the same purpose and people looking for a “REPL” will find it when searching information about the SkookumIDE.
You can also call SkookumScript on the command prompt if you need to – for example to evaluate SkookumScript commands from non-SkookumSript applications such as text editors. See the SkookumIDE Command line arguments page.
Printing to the Log
If you would like to print something other than a result to the Log widget, you can put it in a println() command, which prints out one or more objects and adds a line break (hence the ln for “line” at the end). Printing is an essential and versatile tool for any programmer’s toolbox.
println("Hello, world!")Evaluates to:
Hello, world!
nil
While the result of the simple 6 * 7 earlier was the number 42, the result of a println() command is nil. nil is an object that essentially represents nothing or the absence of a value.
Nihilistic notation
nil, or something like it, is common in many languages (Smalltalk, Lisp, Objective-C, Ruby). It goes by several different names, such as NULL (C), nullptr (C++), and null (JavaScript).
TIP Those with a sharp eye may have noted that the println() command prints out one or more objects.
println("The answer: " 42 " and running on object: " this)The answer: 42 and running on object: 'SkookumDemo'
nil
You can cram in as many arguments to println() as you like and they are all converted to strings and joined together. All SkookumScript objects know how to convert themselves to a string to get a textual representation of themselves.
The println() command above is called with 3 arguments: a string, a number and another string. SkookumScript arguments do not need to be separated with commas , – the parser automatically figures out where one argument ends and another begins. You can use commas if you think it makes things easier to read, though they aren’t necessary.
When you evaluate several commands at once, they will be called one after the other (in sequence).
println("Hello, world!")
println("I'll be your megalomaniacal overlord for today.")
SkookumScript also does not need an end of line or end of expression / statement delimiter such as a semi-colon ; like most C/C++ languages. Some amount of whitespace between each expression is all that is needed.
Select both lines with the mouse or keyboard, and then press F4.
Hello, world!

I'll be your megalomaniacal overlord for today.
nil
Also check out the Debug class in the SkookumIDE by selecting it using the Classes widget and look at its members in the Members widget for more routines that print out to the Log widget.
Workbench Files
The file that stores the text for the Workbench (REPL) widget is located at SkookumIDE\Scripts\workbench.sk and it is saved with your latest changes every time you evaluate a line of code or after some time passes since it was changed. You can also save it manually by pressing Ctrl+S or by shutting down the SkookumIDE.
If you open the context menu for a Workbench, you can select Show in Explorer (or use the hotkey Cltr+Shift+E) to open up the file in the Windows File Explorer or Open in External Editor (or use the hotkey Cltr+E) to open up the file in Your Favorite Editor™. It will use whatever default application that you associate with the SkookumScript .sk file extension.
The file for the Tutorial Workbench is located at SkookumIDE\Scripts\tutorial-workbench.sk and it can also be opened up in an external editor or via the Windows File Explorer by using the context menu or hotkeys.
All these handy Workbench code snippets are reloaded and ready to be reused the next time you run the SkookumIDE.
Language warnings and errors
Errors are something you must embrace if you wish to become an awesome coder. No matter how awesome you get, you will always have errors–though your errors will become progressively more interesting.
The SkookumIDE will helpfully alert you whenever it detects what may be an error and helps visualize it with, different colorizations, red underlines, mouse hover info and more.
Since errors will be a frequent companion and patient teacher, we recommend that you take a look at the Parser error checking page and then return filled with knowledge of error notification goodness.
Work through the “Tutorial Workbench”
Here is a simple command to ensure your project is running in the UE4 editor and it is ready to receive commands from the SkookumIDE:
player_pawn.actor_locationPaste/type the command into the Workbench (REPL), have the caret on the line or select/highlight the text and press F4. The location of the player should be printed in the Log widget and will look something like this:
(770, -345, 322.25)
Now take a moment and read through these examples illustrating some basic concepts of SkookumScript. All these examples can be found already entered in the Tutorial Workbench.
Core SkookumScript Principles
// Simple Math

// Select some code using the mouse or keyboard
// (or just have the caret on the line) then press
// F4 to evaluate the code on the game runtime.
4 + 5

// The result will be printed in the IDE log window.

// Do the same with any of these:
3.0 + 4.5
6 < 4
7 = 9  // equal to (not == such as with C++)
7 ~= 8 // Not equal to (not != as in some languages)

// Use [square] brackets to group sub-expressions.
// SkookumScript has no operator precedence!
[2 + 2] = 4
See more on Operator calls in the Primer.
Simple routine calls
42.negate()           // returns -42
42.negate             // brackets optional if no arguments
42.between?(-3, 100)  // true - call with arguments
42.between?(-3 100)   // comma between arguments optional
See more on Calling routines and passing arguments in the Primer.
Variables!
// The exclamation mark ! indicates that something *new* is being
// created. This creates variable 'bob' and binds it to the
// Integer 9 and bob has the type Integer
!bob : 9

// Assigns the value 7 to bob and bob stays an Integer
// (This is similar to = in some other languages)
// [Needs the variable declaration above also selected.]
bob := 7

// re-binds bob to "Hello World!" - bob type is now a String!
// [Needs the variable declaration above also selected.]
bob : "Hello World!"
Note that the bob variable above will only exist in a selected code snippet that includes the !bob line. All local temporary variables will be forgotten with each evaluation. So evaluate the first line of code and press F4, then select the first two lines of code then F4, then all 3 lines of code.
See more on variables in the Primer.
Conditionals and randomness
// Conditional
if 6>9 [println("Six is greater than nine!")]

// if statement can be used as an expression
// (so can everything)
println(if 5>4 ["Correct"] else ["Not correct"])

// "elseif" is done by using a single if with
// multiple clauses
!a: 8
if a=7  [println("a is 7")]
   a=8  [println("a is 8")]
   else [println("a is neither 7 nor 8")]

// @@random is a class data member that is always available
// to generate random values.

// Randomly print "heads" or "tails"
if @@random.coin_toss ["Heads!"] else ["Tails!"]

// when is another way of expressing a conditional
println("Tails!") when @@random.coin_toss

// unless = "when not"
println("Heads!") unless @@random.coin_toss
See more on Conditionals.
See the Random class in the SkookumIDE and its routines for more examples of generating random numbers and distributions.
Bounded iteration/loops
// Repeat 10 times
10.do[println("Hello World!")]

// You can add line breaks and multiple expressions
10.do
  [
  println("Hello World!")
  // Integer.do() supplies an idx variable you can use
  println("On iteration #" idx)
  ]

// Iterate over a list of numbers
{1 2 3 4}.do[println(item)]

// Iterate in reverse
{1 2 3 4}.do_reverse[println(item)]
See do routines in the Integer and List classes for more info about bounded iteration.
Lists
// Lists of stuff - items separated by whitespace (comma optional)

// Reverses the order of this list's items
{1 2 3 4 5}.reverse

// Applies the method 'negate' to all items of the list,
// returns the result
{1 -2 3 -4}%negate

// Runs some code - a 'closure' - on each item of the list
{1 -2 3 -4}.do[item.negate]

// unless is short for 'if not'
{1 2 3}.do[item++ unless item = 2]

// Make new list based on a selection criteria (again that
// code in square brackets is a closure)
{3 4 5 8}.select[item.pow2?]

// Make new list by rejecting some items of the original list
{3 4 5 8}.reject[item.pow2?]

// Select random item from list
{"A" "B" "C" "D"}.any

// Test if _any_ item from list satisfies a condition
{3 4 5}.any?[item.pow2?]

// Test if _all_ items from list satisfies a condition,
// false here
{3 4 5}.all?[item.pow2?]

// Same, true in this case
{2 4 8}.all?[item.pow2?]
See more on Lists in the Primer.
NOTE For coroutines below to work, the IDE must be connected to the running game when pressing F4. Check in the top right corner to see that it says [Sk] Connected.
Coroutines!
// Coroutines are the secret sauce of SkookumScript.

// Waits 2 seconds then returns
_wait(2)

// Waits 1 second four times and prints "Tick!"
// after each wait
4._do [_wait(1) println("Tick!")]

// Wait random time between .1 and 2 seconds
// Note that commas are not required between arguments
_wait(@@random.uniform_range(.1 2))

// Wait one simulation frame
_wait
Vector math examples
// SkookumScript comes with built-in vector math types.
// Press Alt-G on when the SkookumIDE editor caret is on a class
// to jump to the class in the Classes Widget.
// Check out classes such as: Vector2, Vector3, Vector4, Rotation,
// RotationAngles, Transform, Color

// Creates a 3D vector with x=1,y=2,z=3
Vector3!xyz(1 2 3)

// Adds two vectors
Vector3!xyz(1 2 3) + Vector3!xyz(2 3 4)

// If the type is obvious it will be inferred
// - you don't have to supply it
Vector3!xyz(1 2 3) + !xyz(2 3 4)

// A handy constructor of Vector3 creating a vector
// facing up (positive z direction in UE4)
Vector3!up

// Creates a set of Euler angles to specify a rotation
RotationAngles!yaw_pitch_roll(60 0 0)

// A transform has a position, a rotation and a scale:
// >> means convert to type
Transform!translation_rotation_scale(
  Vector3!xyz(1 2 3)
  RotationAngles!yaw_pitch_roll(60 0 0)>>Rotation
  Vector3!xyz(1 1 1))

// Types can be inferred for arguments
Transform!translation_rotation_scale(
  !xyz(1 2 3)
  RotationAngles!yaw_pitch_roll(60 0 0)>>
  !xyz(1 1 1))

// We've got colors, too
Color.@@yellow
UE4 Engine bindings
// Ok now let's have some fun!
// NOTE: Make sure you have the project SkookumDemo running!

// Select the code below and press F4 multiple times!!!
// Gets list of all Pawns in the world, and runs the
// coroutine _boom on them
Pawn.instances%_boom

// Click on the word _boom and press Alt-G to see how it is
// implemented! Use your mouse previous and next buttons or
// Alt+<- Alt+-> to navigate back and fourth in the history.

// The currently active game world
// (or nil if the game is not running)
@@world

// Is the game running?
not @@world.nil?

// List of levels of the game world
@@world.@levels

// Get the player pawn
player_pawn

// Instruct RoboChar1 to path towards the player
Enemy@'RoboChar1'._path_to_actor(player_pawn)

// Get an actor by name, and find something out about it
// Note that if a class is not used before @ it assumes
// class Actor
@'RoboChar1'.transform

// Play explosion sound at a given actor location
@'TargetPoint1'._play_sound("/Game/ScriptLoaded/Audio/Explosion01.Explosion01")

// Draw text above player
player_pawn._draw_text("Play me!")

// Send random robot to player
Enemy.instances.any._path_to_actor(player_pawn)

// Play _boom effect on random enemy
Enemy.instances.any._boom

// Reset the robots to their corners
robo_reset
Time flow and concurrency
// The secret sauce of SkookumScript - elegantly and
// concisely describe concurrent and sequential behavior

//------------------------------------------
// Time flow example 1: Sequential
// Have each robot path to player one after the
// other then have player go boom.
// Select and run the next four lines
Enemy@'RoboChar1'._path_to_actor(player_pawn)
Enemy@'RoboChar2'._path_to_actor(player_pawn)
Enemy@'RoboChar3'._path_to_actor(player_pawn)
player_pawn._boom

// Then select and reset when complete
robo_reset


//------------------------------------------
// Time flow example 2: Synchronize
// Have each robot path to player simultaneously
// then have player go boom after they *all* arrive.
// Select and run the next seven lines
sync
  [
  Enemy@'RoboChar1'._path_to_actor(player_pawn)
  Enemy@'RoboChar2'._path_to_actor(player_pawn)
  Enemy@'RoboChar3'._path_to_actor(player_pawn)
  ]
player_pawn._boom

robo_reset  // Reset the robots


//------------------------------------------
// Time flow example 3: Race
// Have each robot path to player simultaneously
// then have player go boom when the *first* arrives.
// Select and run the next eight lines
race
  [
  Enemy@'RoboChar1'._path_to_actor(player_pawn)
  Enemy@'RoboChar2'._path_to_actor(player_pawn)
  Enemy@'RoboChar3'._path_to_actor(player_pawn)
  ]
// Stop movement of other robots
Enemy.instances%path_stop
player_pawn._boom

robo_reset  // Reset the robots


//------------------------------------------
// Time flow example 4: Timeout
// Have each robot path to player simultaneously then
// have player go boom when the *first* arrives or when
// 1.5 seconds elapses.
// Select and run the next eight lines
race
  [
  _wait(1.5)
  Enemy@'RoboChar1'._path_to_actor(player_pawn)
  Enemy@'RoboChar2'._path_to_actor(player_pawn)
  Enemy@'RoboChar3'._path_to_actor(player_pawn)
  ]
// Stop movement of other robots
Enemy.instances%path_stop
player_pawn._boom

robo_reset  // Reset the robots


//------------------------------------------
// Act on lists of objects using different timeflow

// Sequential: all robots boom one after the other
// then go to next line after the last completes
Enemy.instances._do[item._boom]

// Synchronize: All robots boom simultaneously then
// go to next line when *all* completed
Enemy.instances%_boom

// Race: All robots boom simultaneously then go to
// next line when *first* completed
Enemy.instances%>_boom


//------------------------------------------
// So here are the previous path commands rewritten
// using lists rather than specifying the robots
// individually.

// All robots path to player one after the other
// and boom player when last arrives
Enemy.instances._do[item._path_to_actor(player_pawn)]
player_pawn._boom

robo_reset  // Reset the robots


// All robots path to player simultaneously
// and boom player when the all arrive
Enemy.instances%_path_to_actor(player_pawn)
player_pawn._boom

robo_reset  // Reset the robots


// Have each robot path to player simultaneously
// and boom player when first arrives
Enemy.instances%>_path_to_actor(player_pawn)
player_pawn._boom

robo_reset  // Reset the robots
More UE4 examples
// Get averaged location of all enemies
GameLib.actor_array_average_location(Enemy.instances)

// Gets list of actors of class 'TargetPoint'
!actors: Actor{}
GameLib.all_actors_of_class(
  @@world TargetPoint.static_class actors)
actors
You can see more SkookumScript code examples at Rosetta Code which also shows the same examples in many other languages for comparison.
Get more in-depth with the SkookumScript language by going to (or returning to) the SkookumScript Primer.